Importing a Modeled Mesh From Blender to Three.js
It has been a very long time since the last Three.js rotating cube post. Better late than never, right? Here is the next part about the import and animation of a more complex mesh created in a modeling software. Yet, as we are not designer (and a fortiori, not 3D designer), we will focus on a not too complicated mesh: the marmelab logo.
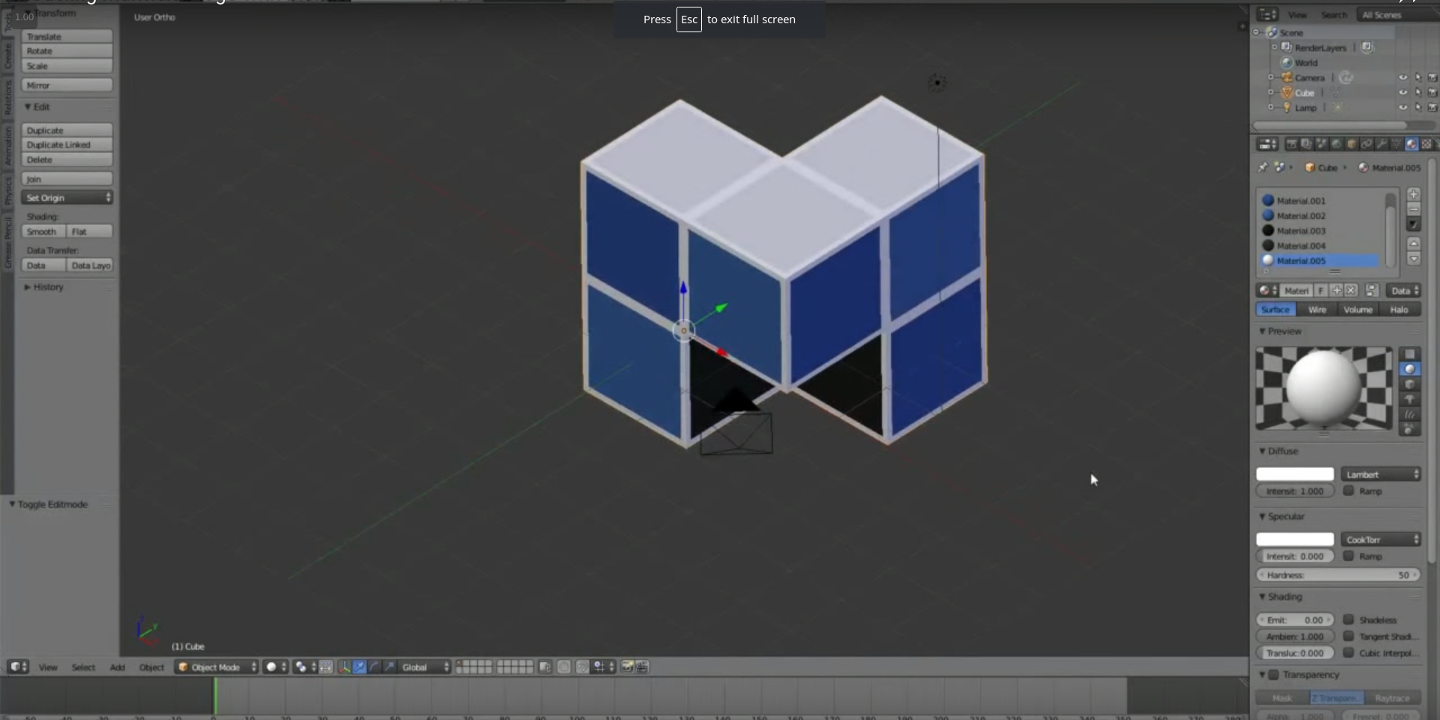
Modeling Marmelab Logo with Blender
We are going to use Blender, a free and open-source 3D modeler. First, let’s create the mesh. Fortunately, marmelab logo is quite simple: it is composed of five cubes glued together to form the letter M. Here is a video describing this modeling:
Export a Blender Mesh in JSON for Three.js
Now that we got our mesh (you can download it here),
let’s take a look on how to export it for Three.js. Three.js expects to get a Mesh in
JSON format. Fortunately, the community has already provided a Blender to Three.js exporter.
So, download it and put the io_three folder under your ~/.config/blender/2.69/scripts/addons/
folder or its equivalent depending your operating system (check the README for more informations).
Then, open the File > User preferences and go to the Addons tab.
Search for Three.js and enable the found plug-in. Now, you should be able to see
a File > Export > Three.js option. On the opened tab, ensure that Face Materials
checkbox is checked. Otherwise, you won’t have materials, and Three.js is going to
refuse to import your mesh.
Once saved, your file should look like the following:
{
    "metadata": {
        "uvs": 0,
        "type": "Geometry",
        "normals": 31,
        "generator": "io_three",
        "materials": 6,
        "version": 3,
        "vertices": 200,
        "faces": 198
    },
    "vertices":[/* ... */],
    "uvs": [],
    "name": "CubeGeometry",
    "materials": [/* ... */],
    "normals":[/* ... */],
    "faces":[/* ... */]
}
All required data is here. The most important are vertices, faces, normals (to compute lighting correctly), and materials.
Importing Mesh From Blender in Three.js
Now we got our mesh into an understandable format, let’s import it in Three.js.
Based on the last tutorial
code, we just have to replace our initCube function by an initMesh one:
var mesh = null;
function initMesh() {
    var loader = new THREE.JSONLoader();
    loader.load('./marmelab-logo.json', function(geometry) {
        mesh = new THREE.Mesh(geometry);
        scene.add(mesh);
    });
}
Note that as you load a file dynamically, you can’t open your file directly with
a browser. You have to use a Web server. On Linux, you can use for instance
the Node.js http-server package.
npm install -g http-server
http-server .
Rotating a Mesh
Do not forget to modify the rotateCube function:
function rotateMesh() {
    if (!mesh) {
        return;
    }

    mesh.rotation.x -= SPEED * 2;
    mesh.rotation.y -= SPEED;
    mesh.rotation.z -= SPEED * 3;
}
As you can see, working with a mesh is exactly the same as working with a primitive. We just check that our mesh is loaded to avoid a warning. Indeed, the loading function is an asynchronous one and then, the rendering loop may start before our model is in memory. A cleaner way to deal with it would be to start rendering only when model is loaded, but let’s keep it simple for this tutorial.
If your refresh your browser, you should now see a wireframed rotating marmelab logo. Yet, if you look deeper, you may see a graphical glitch:
It seems some edges are broken. No mesh has been hurt during this animation, I swear.
It is just a concrete example of the zFar distance from this previous post schema:

The value provided to the camera is not enough. So, we got two solutions: either
increase the camera maximum length vision, or reduce the size of our mesh. Let choose
the latter. Modify the initMesh method adding this line in the callback:
mesh.scale.x = mesh.scale.y = mesh.scale.z = 0.75;This way, we reduce the size of our rotation logo by 25%. The glitch should have disappeared.
Changing Rotation Center Position
Rotation center is currently located at the bottom of one of the M branch. It would be far better if it occurred at the common point of all cubes. To do so, we have to translate the rotation origin, using transformation matrices. Sounds complicated? Fortunately, Three.js simplifies a lot our work:
loader.load('./marmelab-logo.json', function(geometry) {
    mesh = new THREE.Mesh(geometry);
    mesh.scale.x = mesh.scale.y = mesh.scale.z = 0.75;
    mesh.translation = THREE.GeometryUtils.center(geometry);
    scene.add(mesh);
});
All the magic happens on the mesh.translation line. We retrieve the center of
our mesh, thanks to the GeometryUtils.center, and then translate it accordingly
to make it rotate on its center.
Loading Materials
Our Blender file contains several materials in order to colorize different faces.
So, let’s add these materials to our mesh to get rid of this wireframe display.
Materials are also loaded through the loader.load method. You just have to
add a second argument materials to the callback function:
loader.load('./marmelab-logo.json', function(geometry, materials) {
    mesh = new THREE.Mesh(geometry, new THREE.MeshFaceMaterial(materials));
    // ...
});
Do not forget to pass materials to the THREE.MeshFaceMaterial function, otherwise
you would get the following error:
Cannot read property ‘uniforms’ of undefined
Let There Be Light
We don’t have wireframes anymore, but our textures are fully black. This is due to a lack of light on our scene.

So, let’s create a new initLights method and let’s call it in our init function:
function initLights() {
    var light = new THREE.AmbientLight(0xffffff);
    scene.add(light);
}
We added here a white AmbientLight. This kind of light is applied everywhere, so
you don’t have to worry about the light position. As we are going to see lights in
more details in another post, I won’t cover it for the moment.
Woohoo! We now have a nice looking marmelab logo. As usual, demonstration and source code are both available on GitHub.